
Quick Summary
This guide details essential automatic gate troubleshooting steps to help property owners safely diagnose unresponsive operators and prevent dangerous mechanical hazards. Drawing on decades of specialized experience, Ironworks Gate Co. highlights that many operational failures stem from dirty photo-eyes, tripped breakers, or ground movement rather than blown control boards. Readers will learn to perform basic power and sensor checks systematically, while recognizing when complex electrical or structural issues require scheduling an on-site assessment with Ironworks Gate Co.
Automatic Gate Troubleshooting: Fast Fixes & Safety Steps
When an entry gate stops moving, basic automatic gate troubleshooting begins by isolating your main power source, optical safety sensors, and the manual drive release. Running through a methodical check takes about fifteen minutes and will show you whether you are dealing with dirty photo-eyes, dead remote batteries, or mechanical binding from shifting soil.[1]
As specialists at Ironworks Gate Co. often observe, most property owners assume a motionless gate means a blown control board or a dead motor. In reality, a large percentage of access problems come from tripped safety sensors, track obstructions, or physical drag caused by ground movement. Automated gates are heavy, high-torque machines that can present severe hazards if safety devices fail. Regulators worldwide treat automated access points with extreme caution. The UK Health and Safety Executive warns that pedestrians face severe risk from crushing zones on electrically powered gates and emphasizes that safety devices must be checked regularly. WorkSafe New Zealand similarly notes that automated gates without functional safety devices are hazardous during both opening and closing cycles. Before handling electrical wiring or forcing stuck machinery, run through these systematic steps to locate the fault safely. See also Gate Repair Grapevine Tx | 10% Off & Free Estimate | On-Site in 60 Minutes.
What You Need for Safe Automatic Gate Troubleshooting
Safety comes first whenever you diagnose automated access equipment. Automated gate panels can be heavy and generate substantial force, creating potential crushing, shearing, entanglement, and impact zones. The U.S. Consumer Product Safety Commission (CPSC) has warned of severe entrapment injuries and deaths involving moving gates and stationary support posts or security fences. Never place your hands through pickets or stand in the travel path while an operator is connected to power.[2]
Essential Tools for Gate Diagnostics
Gather these basic diagnostic tools before testing your system:
- Digital multimeter: To test incoming line voltage, transformer output, and battery backup charge.
- Torpedo level and measuring tape: To identify structural hinge sag, post lean, and track deflection.
- Soft microfiber cloth: To clean optical sensor lenses and reflectors without scratching the plastic housings.
- Silicone lubricant spray: For roller bearings and pivot hinges (avoid heavy grease that attracts dirt and road grit).
- Manufacturer manual disconnect key or release pin: To safely disengage the drive clutch during testing.
Quick Diagnostic Checklist
If your gate refuses to cycle, check these three items before booking a repair service:
- Verify breaker and switch status: Check the main breaker box, exterior GFCI outlet, and the on/off power switch inside the operator enclosure.
- Inspect the optical safety path: Check that your photo-eyes are clean, unobstructed by tall grass or spiderwebs, and pointed directly at each other.
- Test for mechanical drag: Disengage the operator clutch and move the gate by hand. It should glide smoothly across the entire travel path without sticking or scraping.
Step 1: Check Power Supply, Breakers, and Operator Fuses
When an electric gate won’t open, verify that the unit is actually receiving power before suspecting internal electronic failure.
Resetting GFCI Outlets and Sub-Panels
Trace the primary electrical line back to your main breaker panel or sub-panel. Outdoor gate operators frequently run through an external GFCI receptacle or a dedicated breaker switch. These breakers often trip after heavy rainstorms, electrical surges, or instances where a binding hinge causes the electric motor to draw excess current and trip the circuit.
Inspecting Control Board Fuses and Transformers
Turn off the main power switch before opening the weather-resistant operator housing. Once inside, look over the control board for warning lights and physical damage:
- Inspect motherboard fuses: Look for fuses on the board. A broken internal filament indicates an electrical surge or an over-current event caused by mechanical resistance. Always replace blown fuses with an exact match as specified by the manufacturer.
- Check the step-down transformer: Use your multimeter to verify whether the transformer is converting incoming voltage down to the appropriate operating voltage required for the logic board.
- Test battery backup voltage: Solar systems and units with battery backup depend on stable DC reserves. If the batteries lose adequate charge under load, the logic board may lock out gate travel to prevent running out of power mid-cycle.
Step 2: Clean and Realign Photo-Eye Safety Sensors
Need automatic gate troubleshooting?
We’re available now - call for a fast, free estimate.
When an electric gate won’t close or reverses direction immediately after starting to move, the safety photo-eyes are almost always the cause. Modern gate openers require continuous communication between infrared transmitters and receivers to prevent closing on vehicles, pedestrians, or pets.[3]
Fixing Optical Beam Alignment and Blockages
Photo-eyes sit low to the ground where dust, moisture, insects, and weed growth can easily block the infrared beam. Troubleshoot your sensors with these steps:
- Clean the lenses: Wipe dirt, cobwebs, and insect nests off both sensor covers using a damp microfiber cloth.
- Check the LED diagnostic lights: Look closely at the receiver housing. Most units display a steady LED when the beam is connected. A blinking, flickering, or unlit LED means the beam is misaligned, blocked, or lacking power.
- Realign the mounting brackets: Loosen the sensor bracket screws slightly and adjust the angle until the diagnostic LED indicates proper alignment. Tighten the hardware firmly so wind vibration does not knock the sensor out of alignment.
Dealing with Condensation and Sunlight Glare
Direct morning sunlight striking an optical receiver lens can blind the sensor, causing the board to read a false obstruction. Similarly, heavy condensation inside cracked sensor housings can scatter the infrared signal. If your gate consistently fails at the same time of day, install protective sun hoods over the sensor housings or replace damaged weather seals.
Step 3: Check for Soil Movement, Hinge Sag, and Track Drag
In regions with expansive clay soils (such as North Texas communities like Grapevine, Southlake, and Colleyville), Ironworks Gate Co. notes that ground shifting is a major source of gate failure. Soil expansion during wet seasons and contraction during dry spells places pressure on concrete post footings. When support posts shift out of plumb, the gate panel binds in its swing or drags along its slide track.
Soil Movement vs. Logic Board Failures
Many property owners assume control boards are failing when the true problem is physical drag. Modern operators monitor motor resistance. If a sagging hinge or settling track forces the motor to push harder than its preset force limit, the operator treats that resistance as an obstruction and stops or reverses. Before replacing circuit boards, check whether the gate structure is binding.
Checking Level, Bearings, and Track Clearance
- Check post plumb: Place a level against the main hinge post or slide gate guide posts. Any noticeable tilt indicates ground settlement.
- Push the gate manually: Release the mechanical drive clutch and push the gate through its entire arc or slide path. The leaf should move with steady hand pressure. If you feel sudden resistance, grinding, or sticking, the issue is mechanical, not electrical.
- Inspect slide gate track hardware: Clear gravel, mud, and hard-packed dirt out of tracks. Inspect lower roller wheels for flat spots, seized bearings, or loose hardware.
Step 4: Test Remotes, Keypads, and Access Controls
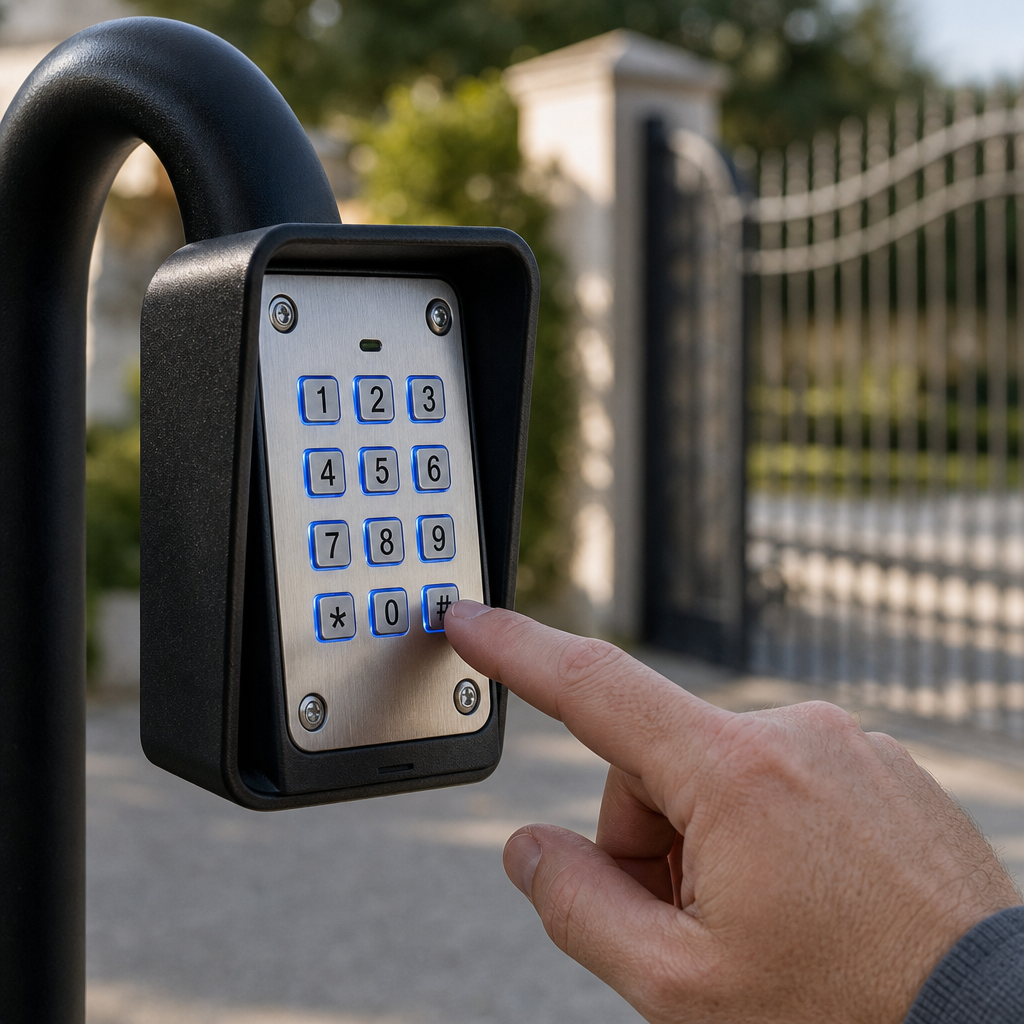
If your gate operator has power and the safety eyes are clear, the issue may sit within your access control accessories.
Isolating Radio Remote Interference
To confirm whether the problem is your remote or the gate operator, open the housing and press the onboard test button on the logic board. If the gate opens normally, the operator motor and board are intact, which narrows the issue to the receiver, remote, keypad, or loop detector:
- Check remote batteries: Replace coin-cell batteries and check for corroded contacts inside the handheld clicker.
- Inspect the antenna wire: Ensure the external radio antenna wire is straight, intact, and not pinched inside the metal enclosure.
- Check for local radio frequency interference: Nearby electronics, floodlights, or wireless gear can reduce radio range. Stand near the operator to test the signal.
Keypads, Phone Entry Systems, and Exit Loops
- Inspect keypad wiring terminals: Look behind wall-mounted keypads for water intrusion, pests, or corroded wire terminals that can bridge contacts and lock the open circuit.
- Check in-ground loop detectors: Inductive vehicle exit loops cut into pavement can fault after ground shifts. Check the loop detector module inside the operator cabinet. If the detection LED stays on constantly with no vehicle present, adjust sensitivity according to the manufacturer manual or check loop wiring.
Step 5: Check Operator Limits, Drive Chains, and Clutch Tension
Need automatic gate troubleshooting?
We’re available now - call for a fast, free estimate.
Operator limits and drive mechanisms tell the motor when to decelerate and where to stop. If limit switches slip or drive chains stretch, the gate can slam into physical stops or halt before latching closed.
Adjusting Open and Close Limit Switches
If your gate stops short or overshoots its catch post, recalibrate the limits:
- Mechanical limit cams: On chain-drive and screw-drive operators, adjust the threaded limit nuts or microswitch trigger cams to refine the stopping point.
- Magnetic limits: Slide the magnetic collars along the rack or arm until the board registers the correct end-of-travel position.
- Digital limits: Follow the manufacturer manual to clear the board memory and run a fresh open/close learning cycle.
Tensioning Chains and Inspecting Articulated Arms
Slide gate drive chains naturally stretch over time. A loose chain will sag, whip during startup, and jump teeth on the drive sprocket. Tighten the tensioning bolts on both ends of the gate leaf until excess sag is eliminated as specified by the manufacturer. For swing gates, inspect mechanical joints and actuator arm mounting pins for excess play, wear, or metal fatigue.
Step 6: Safely Use the Manual Release During a Power Outage
During power outages or mechanical breakdowns, you need to open your gate by hand. Always follow proper mechanical release procedures to avoid injury and prevent equipment damage.
According to the Door and Hardware Federation (DHF), many severe gate accidents happen when sliding gates come out of their runners, frequently during manual movement following a power failure. Always verify that physical end-stops are securely bolted at the track ends before rolling a manual gate panel.
Manual Disconnect Steps for Swing and Slide Gates
- Switch off electrical power: Turn the main breaker or power switch off so the gate cannot start moving unexpectedly if power returns.
- Secure sloped gates: If your driveway has an incline, support the gate leaf before releasing the clutch so gravity does not swing the panel out of control.
- Unlock the drive release: Insert the manufacturer release key into the operator lock, turn the handle, or pull the mechanical disconnect pin on the drive arm.
- Move the panel steadily: Push the gate open slowly and latch it in place to keep it from swinging back into vehicle traffic.
Deciphering Diagnostic Board Indicators
Most commercial and residential gate operators feature diagnostic LED indicators or digital readouts to help pinpoint system faults:
| System Interface | Visual Indicator | What It Means |
|---|---|---|
| Diagnostic Flash LEDs | Numbered flash patterns | Indicates an active photo-eye trip, safety edge compression, or limit switch fault. |
| Input Status LEDs | Solid “Open” or “Safety” light | Shows that a wired accessory (keypad, exit loop, or safety sensor) is holding a circuit open. |
| Digital LCD Screen | Alphanumeric error codes | Displays specific motor thermal overloads, low battery warnings, or encoder slip codes. |
| Relay Indicator Lights | Unlit accessory LED | Signals an onboard low-voltage fuse failure or an inactive auxiliary power circuit. |
What Does Automatic Gate Troubleshooting and Repair Cost?
Based on third-party industry cost estimates not verified in this brief, a standard professional service call for automatic gate troubleshooting and minor repair typically ranges from $150 to $350. This fee generally covers diagnostic labor, mechanical alignment checks, photo-eye cleaning, and limit switch recalibration.
| Inspection Element | DIY Action | Professional Service Call |
|---|---|---|
| Photo-Eye Alignment | Clean lenses, tighten bracket | Check optical alignment, test wiring harness, verify safety compliance |
| Power and Logic Board | Check breakers, replace simple fuses | Transformer testing, circuit board diagnostics, relay replacement |
| Structural and Foundation Drag | Clear track debris, visual inspection | Leveling checks, hinge adjustments, post stabilization, track resetting |
| Typical Cost Range (Estimated) | $0 to $30 (fuses, cleaner) | $150 to $350 (external estimate for diagnostics and minor fixes) |
Frequently Asked Questions About Automatic Gate Troubleshooting
Why is my automatic gate not opening or closing?
An automatic gate that refuses to move usually has no electrical power, a tripped breaker, blown control board fuses, dead remote batteries, or an obstructed safety sensor. If the motor hums but the panel stays still, check whether the mechanical drive clutch is disengaged or if soil movement has caused the gate leaf to bind against the post or track.[4]
How do I fix electric gate sensor alignment problems?
To realign safety sensors, clean the lenses with a soft microfiber cloth and clear away nearby plants or debris. Loosen the bracket mounting screws slightly and adjust the angle until the status LED on the receiver indicates proper alignment. Tighten all hardware securely to prevent vibration from knocking the sensors out of line.
Why does my automatic gate reverse before closing completely?
A gate that reverses mid-cycle is usually responding to an active safety device or an obstruction sensor. If the infrared beam is clear, the operator’s internal force limit may be tripping due to physical resistance from sagging hinges, dirty slide tracks, or posts pulled out of plumb by shifting ground.
What should I do if my gate remote control or keypad stops responding?
First, test the operator by pressing the onboard open button inside the motor housing. If the gate runs, replace the remote batteries and check the antenna wire on the receiver. For keypads, look for corroded wire terminals, pest buildup inside the case, or discharged battery packs.
How can I manually open an electric gate during a power outage?
Turn off the primary power switch to prevent unexpected startup. Use the manufacturer release key or pull the manual disconnect arm pin to disengage the motor drive. Once released, carefully push the gate open by hand and secure it to prevent wind from swinging the panel into vehicles.
When is automatic gate repair safe to DIY versus calling a professional?
Routine maintenance tasks, such as cleaning sensor lenses, clearing track debris, replacing remote batteries, and resetting external breakers, are safe to handle yourself. However, if troubleshooting involves high-voltage power lines, internal gearbox repairs, complex logic board soldering, structural post resetting, or high-tension hardware, contact a qualified gate technician like Ironworks Gate Co. to complete the repairs safely.
Need automatic gate troubleshooting?
We’re available now - call for a fast, free estimate.
Sources
- Injury patterns and epidemiology of automatic door-related … – pubmed.ncbi.nlm.nih.gov (2024)
- [PDF] 2024-11-20-COPF-CODD-Hummingbird-Alliance-Meeting-Log.pdf – cpsc.gov (2024)
- New Safety Standard for Automatic Security Gates Helps … – cpsc.gov (2000)
- Toys & Children Products – cpsc.gov (2011)
Related reading: Security Gate Repair | 10% Off & Free Estimate | On-Site in 60 Minutes
Related reading: Automatic Gate Repair Cost | Call Now-10% Off | On-Site in 60 Minutes | Free Estimate
Related reading: Gate Operator Repair – Call Now-10% Off – On-Site in 60 Minutes – Free Estimate
Frequently Asked Questions
Why does my automatic gate motor hum or click without moving the gate?
A humming or clicking motor typically points to a failed starting capacitor, a locked mechanical drive, or severe physical binding caused by post settlement. If disengaging the manual clutch allows the panel to glide freely by hand, the fault lies within the motor gearbox or logic board, requiring technical diagnostics from Ironworks Gate Co.
How long do automatic gate backup batteries typically last before needing replacement?
Standard 12V or 24V gate operator backup batteries generally last between 2 and 4 years depending on ambient temperature swings and cycle frequency. If your gate moves sluggishly or displays low-voltage error codes despite active main power, the battery cells have likely degraded under load and need replacement.
How often should an automatic gate system undergo professional maintenance?
Residential gates should receive a comprehensive professional tune-up at least once a year, while commercial systems require semi-annual servicing. Routine inspections by Ironworks Gate Co. keep photo-eyes aligned, chains tensioned, and structural hinges adjusted to counteract seasonal soil shifting.
About the author
 |
Steven Caldwell Steven Caldwell is a licensed access control technician and technical writer with over 12 years of experience in residential and commercial gate systems. He holds an associate degree in electronics technology from Tarrant County College. Drawing on his field experience, Steven writes informative guides to help property owners in North Texas understand gate maintenance, troubleshoot common issues, and navigate repair costs. |
Gate not opening, off track, or opener dead?
We’re available now - call for a fast, free estimate.
Call Now - Free Estimate